The Complete Online Course Launch Checklist – Your Blueprint for Success
2 comments
2 comments
You’ve poured your heart and soul into crafting an extraordinary online course you know will offer immense value to your audience. Now comes the exciting part! It’s time to unveil it to the world so as many people as possible can reap the benefits of your brilliant insights and so you can start earning from your new course!
But where do you start? A course launch has so many moving parts that it can feel overwhelming. With all the crucial tasks involved in an online course launch, you can easily slip into analysis paralysis - leaving your course gathering dust while your potential students flock to other course creators.
Don’t let that thought stress you out or keep you up at night. While every course is a bit different, all launches follow the same fundamental process:
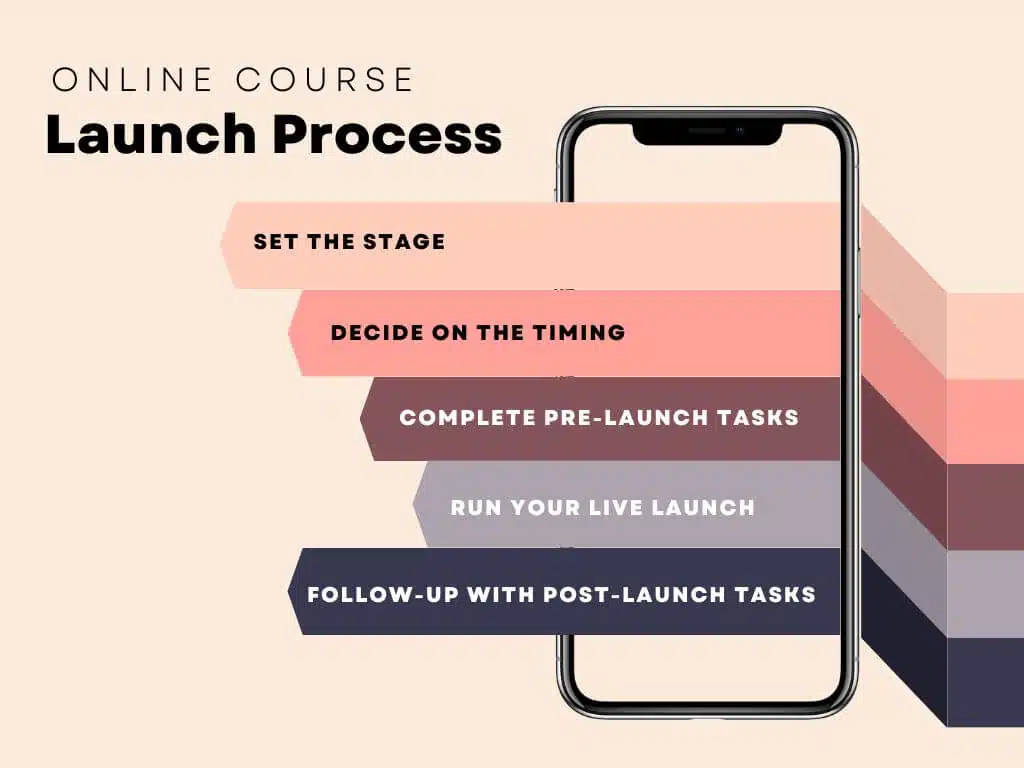
I know, it looks like there’s a lot to do! However, we’ve outlined all your tasks for you .
All you need to do is work your way through and check off each as you go.
Before you know it, you’ll have a highly profitable course launch under your belt, and you’ll be ready to get to work on your next one!
So let’s dive into that launch process now…
Launching a course can be simple, but launching a successful course requires a coordinated effort and some carefully orchestrated planning on your part.
One of the big differences between a profitable online course and one that languishes in the nether regions of the internet is the foundation it’s built on. Don’t fret! If your course is going to be built on a rock-solid foundation, here’s what to expect.
You need to…
Set the stage for a successful course launch
Determine the timing for your launch
Drum up excitement and an audience for your launch
Write a killer sales page to convert visitors into students
Keep in touch with your students and ask for feedback and testimonials
And that’s just the start! Before you break out in a sweat, take a deep breath. Then read on for my complete guide and checklist for launching a successful course that will break these items down in depth.
To make sure your course shines out from any competition, make sure you complete the following activities.
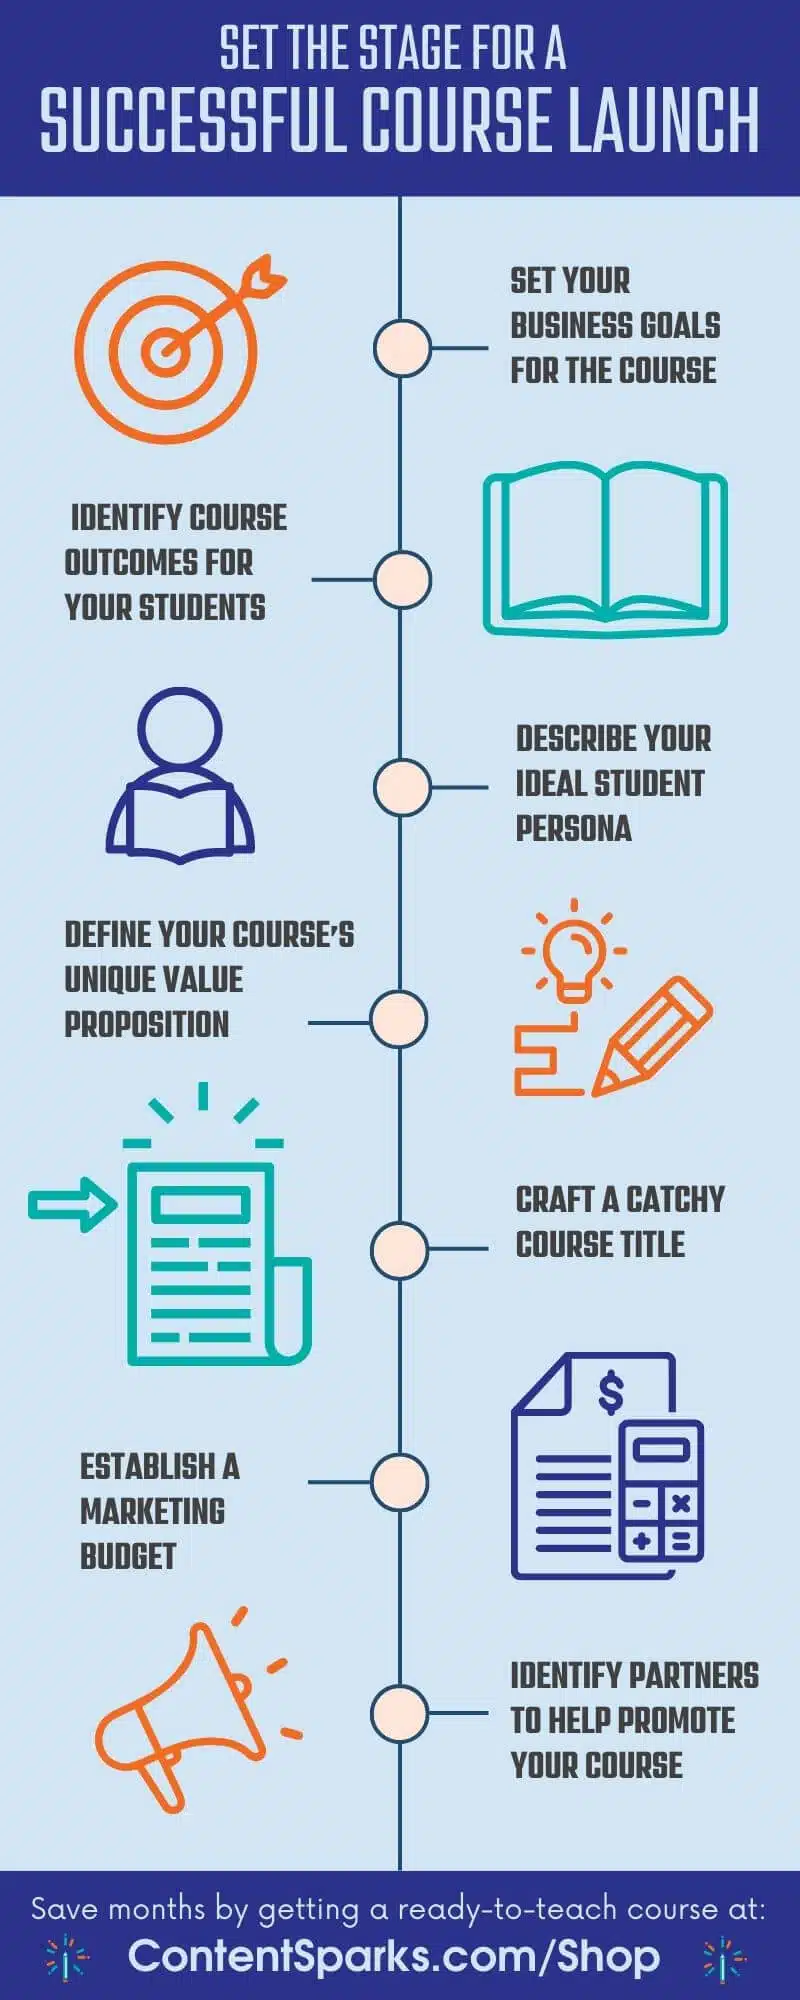
Goals are essential for any marketing plan because they provide direction, motivation, and focus. Having specific goals for your course also gives you a way to measure how successful its impact has been on your business.
For example, if your goal is to build an email list of leads for your other products, you can use week-to-week subscriber growth to measure your course’s success.
If you aim to gain new coaching clients at the end of your course, you could measure the number of strategy calls you book with potential clients.
Here are some examples of goals you might have for your course:
Choose a goal that ties in with your overall business goals. Then identify how your online course will achieve that goal and how you will measure success.
Next, you’ll define the learning objectives and outcomes for your students. What will they be able to do once the course is complete? How will that impact or transform their lives?
Let’s say your students are solo service providers struggling to attract new clients. Your course might teach them how to run virtual workshops to attract and convert prospects to clients. The outcome could be that they’ve run their first workshop and booked their first client.
Defining course outcomes will help you choose appropriate marketing strategies and create content that resonates with your ideal student.
Your ideal student persona is the individual who would most benefit from your course. Describing your ideal student is something you did when you designed your course, but you need to summarize that persona again since it also drives your marketing plan.
In your description, include everything you have learned about your ideal student so you can choose the most effective marketing methods and channels.
Your ideal student persona should include the following:

Create your ideal student persona using feedback from your target market and what you already know about your students.
Your unique value proposition (UVP) clearly articulates the distinct benefits and value your online course offers your target audience.
Clarifying your UVP is essential for attracting the right students and setting realistic expectations. Like your ideal student persona, your UVP will help you create the appropriate launch and marketing materials.
Think back to the course outcomes you listed before. Then, ask yourself these questions to help you craft your UVP statement:
For that last question, you’ll need to know a bit about competitors’ courses. Research what’s being offered in your niche to identify how your course differs.
Finally, create a concise statement for your marketing plan that describes your UVP in terms of your target audience, the benefits the course offers them, and what makes your course unique.
Choosing a good title for an online course is crucial for attracting potential students and conveying the essence of the course. It should be:
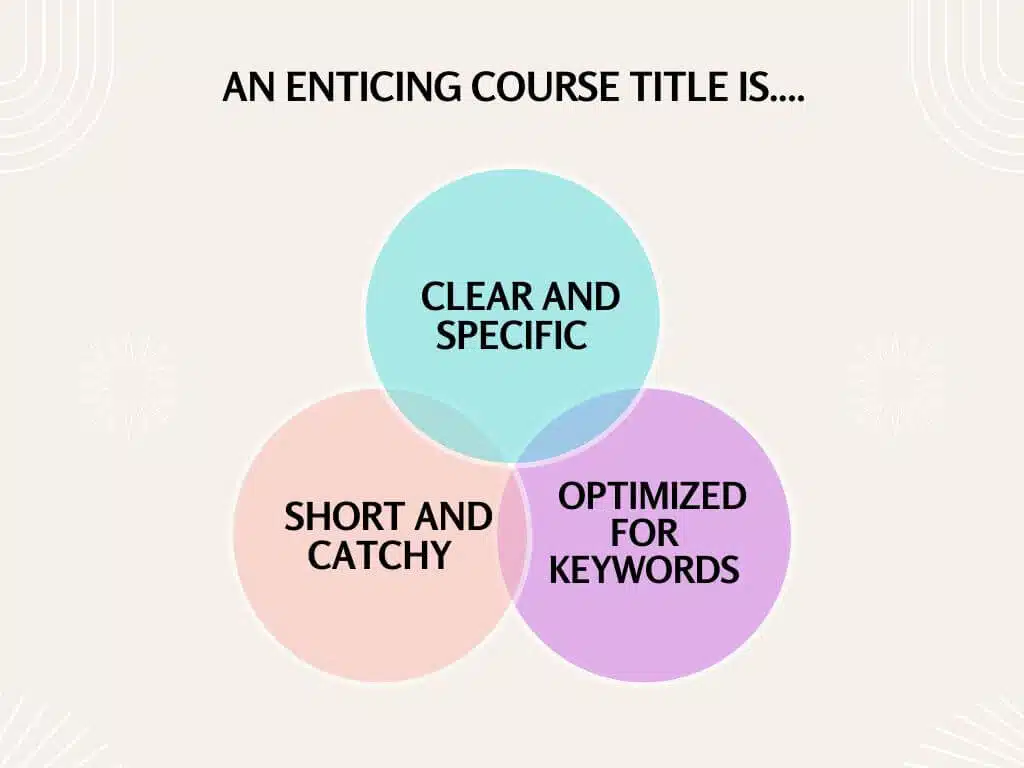
The title should also communicate the benefits students will gain from taking the course. For example, if the course helps students learn a specific skill, mention that skill in the title.
Test your title ideas with other people to get feedback. Ask your friends, colleagues, or potential students for their thoughts on the title. You can use their feedback to refine the title and make it more effective.
Remember that a good title can make a massive difference in the success of your online course, so take your time to choose the best one.
To keep your marketing budget under control and realistic, start by identifying the marketing channels that you’ll use. Each of these channels has different costs and can require different budgets. Once you have identified the marketing channels, estimate the costs of each.
For example, if you plan to use Facebook advertising, you must estimate the cost of running ads, targeting, and testing. If you plan to use influencer marketing, you will need to calculate the cost of collaborating with influencers and producing content. Remember, marketing is just one of many activities that go into the cost of creating an online course.
Once you have estimated the costs, allocate your budget to each marketing channel. You should also set aside some budget for unexpected expenses and testing. As the launch approaches, you’ll keep track of costs and adjust as necessary.
Will you enlist the help of anyone else in your online course? You could create and present the course with a partner or use an expert for one part of the course where their expertise is needed. You might have an affiliate program or get an influencer to promote your course. Create a plan for doing this and identify everything you need to do before you get started on your online course launch checklist.
The Ultimate Online Course Launch Checklist
Use this checklist to take action with your online course today!
The next step is to decide on the precise timing of your course launch. There is no “best” time for every course. It depends on various factors, but a good guideline is to allow at least one month to build buzz and grow your audience.
Timing for the launch itself depends on how long you want to keep enrollment open. The length of time your enrollment is open is up to you, but it’s usually one-week maximum.
Look at your ideal student persona and determine if a particular time of year or phase of your sales cycle would be optimal for your students. You might also time your course with a product launch, a slow sales period, or another event in your business or the market.
Once you’ve laid the foundation and set the timing for your course, there are 3 stages to the course launch.
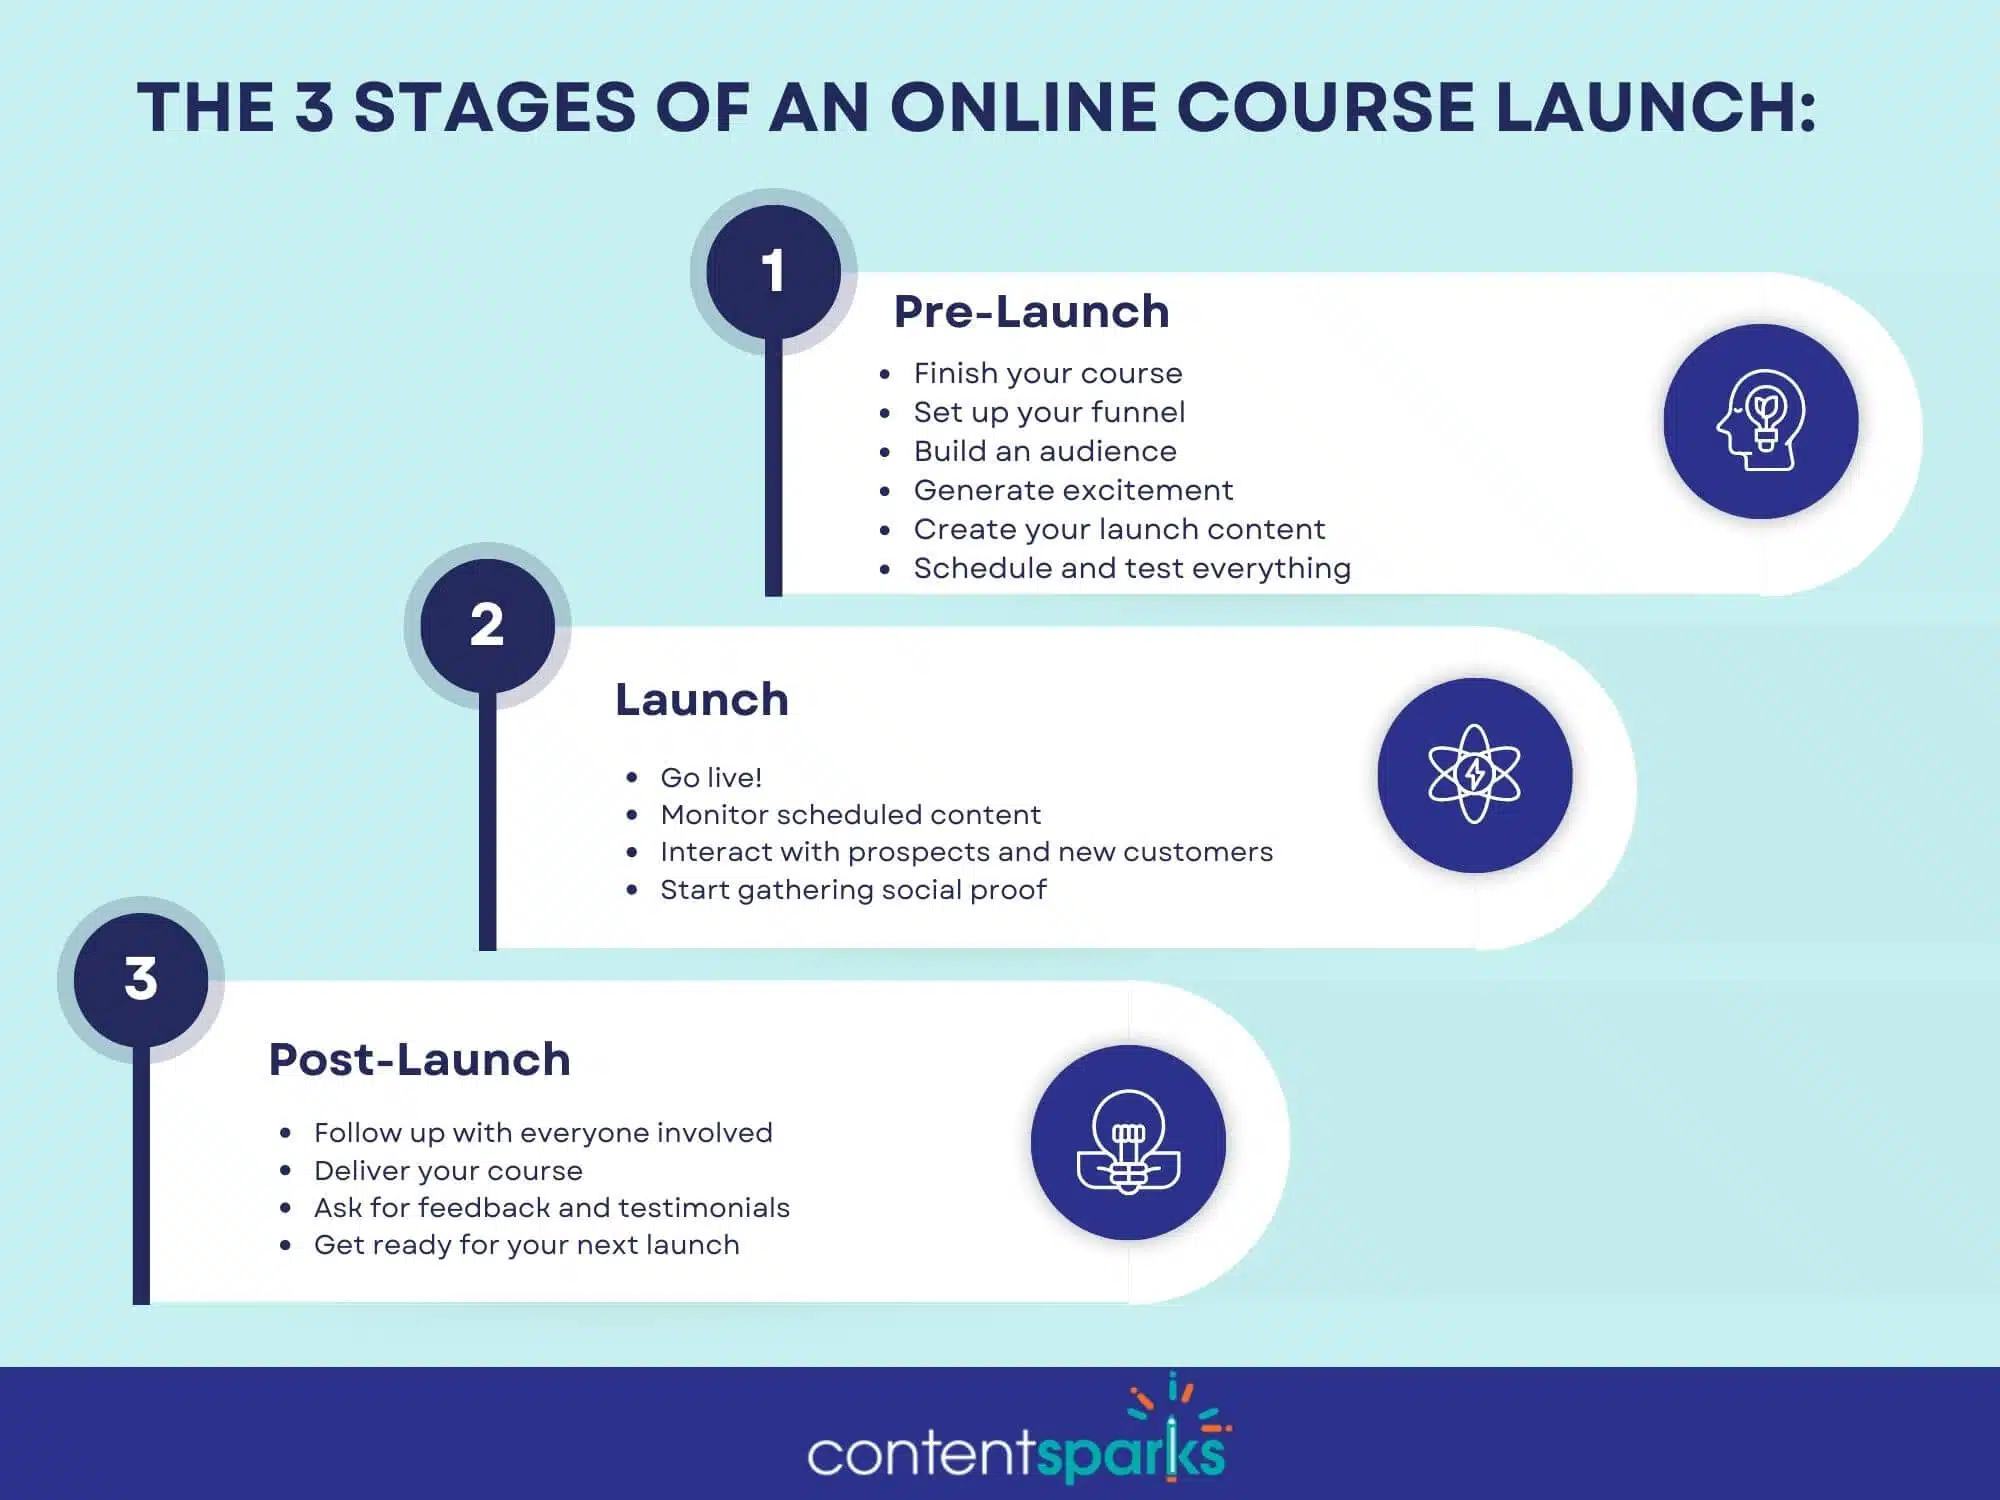
Your online course launch checklist is a document that lists all the activities you need to do before, during, and after your launch. It makes it easy to get everything done by showing you what to do next.
Worried you’ll miss something? We’ve compiled the most critical tasks for each stage of your launch and broken them up into 3 checklists. Then you can customize everything based on your own launch strategy. That’s the ultimate joy of a checklist!
Let’s start with the largest one, which is for the pre-launch stage:
You’ll do most of the work to set up the course launch while in the pre-launch phase.
The first step is to ensure your course is complete and the content is ready for your students.
Next, you need to set the pricing for your course and decide on any special offers or discounts for the launch period.
Pricing a course is a massive topic in of itself, so if you’re brand new check out my guide to pricing an online course.
Your launch schedule starts with deciding how long your pre-launch will be. Pre-launch is the time when you’re building buzz for your course. The best practice is to generate excitement for your launch about a month or so before the cart opens, but it could be longer.
Next, you need to decide how long to keep your shopping cart open. Most courses have the cart open for about 5 days to 2 weeks. That’s the period of time when people can enroll in your course. For a first-time launch, a week is good.
While it’s good to leave the cart open for longer as more people can sign up, you’ll have to manage it, so it can get hectic if you have it available for more than a week or so.
Include early bird specials or any other pre-sales in your schedule.
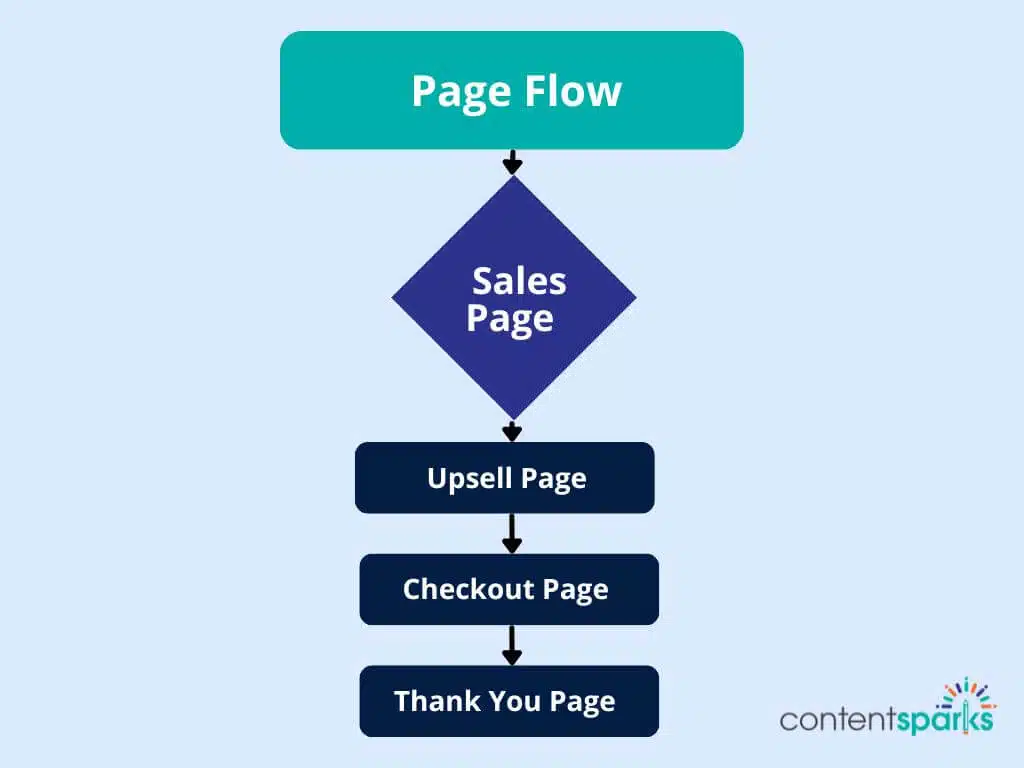
Next, you’ll create your sales pages. These are how your prospective students will learn about your course, pay for enrollment, and receive information on how to access it.
Most online course platforms have the option to create these pages right inside the platform, so that you don’t have to sign up for extra tools. They also provide templates for layout and wording, so that you don’t have to come up with something from scratch.
Check out my guide to writing a sales page that converts like crazy to optimize your course sales page.
You should also include the following pages, which should be built into your course platform and will usually have options for layout and wording you can use:
Make sure you test all the pages in your funnel and that all the links work. Look for ways you can optimize pages and remove potential bottlenecks.
You’ll get the highest conversions at the start of your launch when you create enticing and engaging content to build an audience and get them excited about your upcoming course. If you offer high-quality content that helps members of your target audience solve problems they’re facing, they’ll be hungry for more. Then, when you put your online course offer in front of them, they’ll buy it.
I’ve covered my favorite 19 tactics to promote a course, and the following are a few of my favorites.
One of the most effective ways to sell your course during your launch is through email. If you don’t have a list, you can start building one by offering valuable, free content that people receive in exchange for their email address.
There are a million tactics for building buzz and excitement about your upcoming course. Pick a few and see which ones work best, focusing on those you enjoy doing most and which you think will reach the most potential customers.
It’s infinitely easier to sell to an existing audience and drum up excitement than it is to try to build a blazing sales fire after your course launches.
Pre-selling is a marketing strategy that involves securing sales for a product or service that’s in the making. It’s a common practice followed by many businesses that want to generate excitement and revenue before doing a more extensive, public release of their products or services.
If you haven’t read my complete guide to preselling an online course, check it out. Here’s a quick rundown of what you’ll do to presell your online course:
You’ll also need some content specifically for when your course launch is live.
Now, it’s time for a final check to make sure all your content is ready. Here are a few things to do at this point in your pre-launch stage:
You may want to post a countdown timer as another final piece of pre-launch content. This is a timer that counts down the days and minutes in real time as the launch approaches.
If you decide to create a countdown timer, put it on the course sales page, your blog, and anywhere else you’re promoting the launch.

Download the FREE Online Course Launch Checklist
Want a copy of this checklist, so you'll have it on hand when you're launching your next course?
It’s launch day! Now what? When you get to the day that your launch is live and your course is open for enrollment, here is what you need to do:
Notice that this checklist is a lot shorter than the pre-launch one? If you do all the prep work and content creation in advance, your live course launch is a relaxing and fun time when you can interact with potential students and enjoy watching those sales come in.
Remember that after the launch, you still have things to do! You may be spending most of your time with your new students, but check these tasks off your list too.
And finally, the most important item on your online course launch checklist:
Once you have one successful course under your belt, you can start building a whole online academy, membership site, client training library, and more. If you’re tired of doing 1:1 coaching or consulting, you can shift away from that work and build an entire business around online courses. You can even make the bulk of the course delivery automated so you can earn passive income and gain the freedom to pursue other passions!
Ready to Launch Your Course and Skyrocket Your Revenue?
Now that you know what’s involved in launching your online course, it’s time to take action and start transforming lives as you generate new income for yourself. Your next step is…
Request our Online Course Launch Checklist by clicking on the button below:
Just enter your name and email. We’ll send the checklist right to your inbox.
Then all you need to do is work your way through the checklist to get your course out into the world.
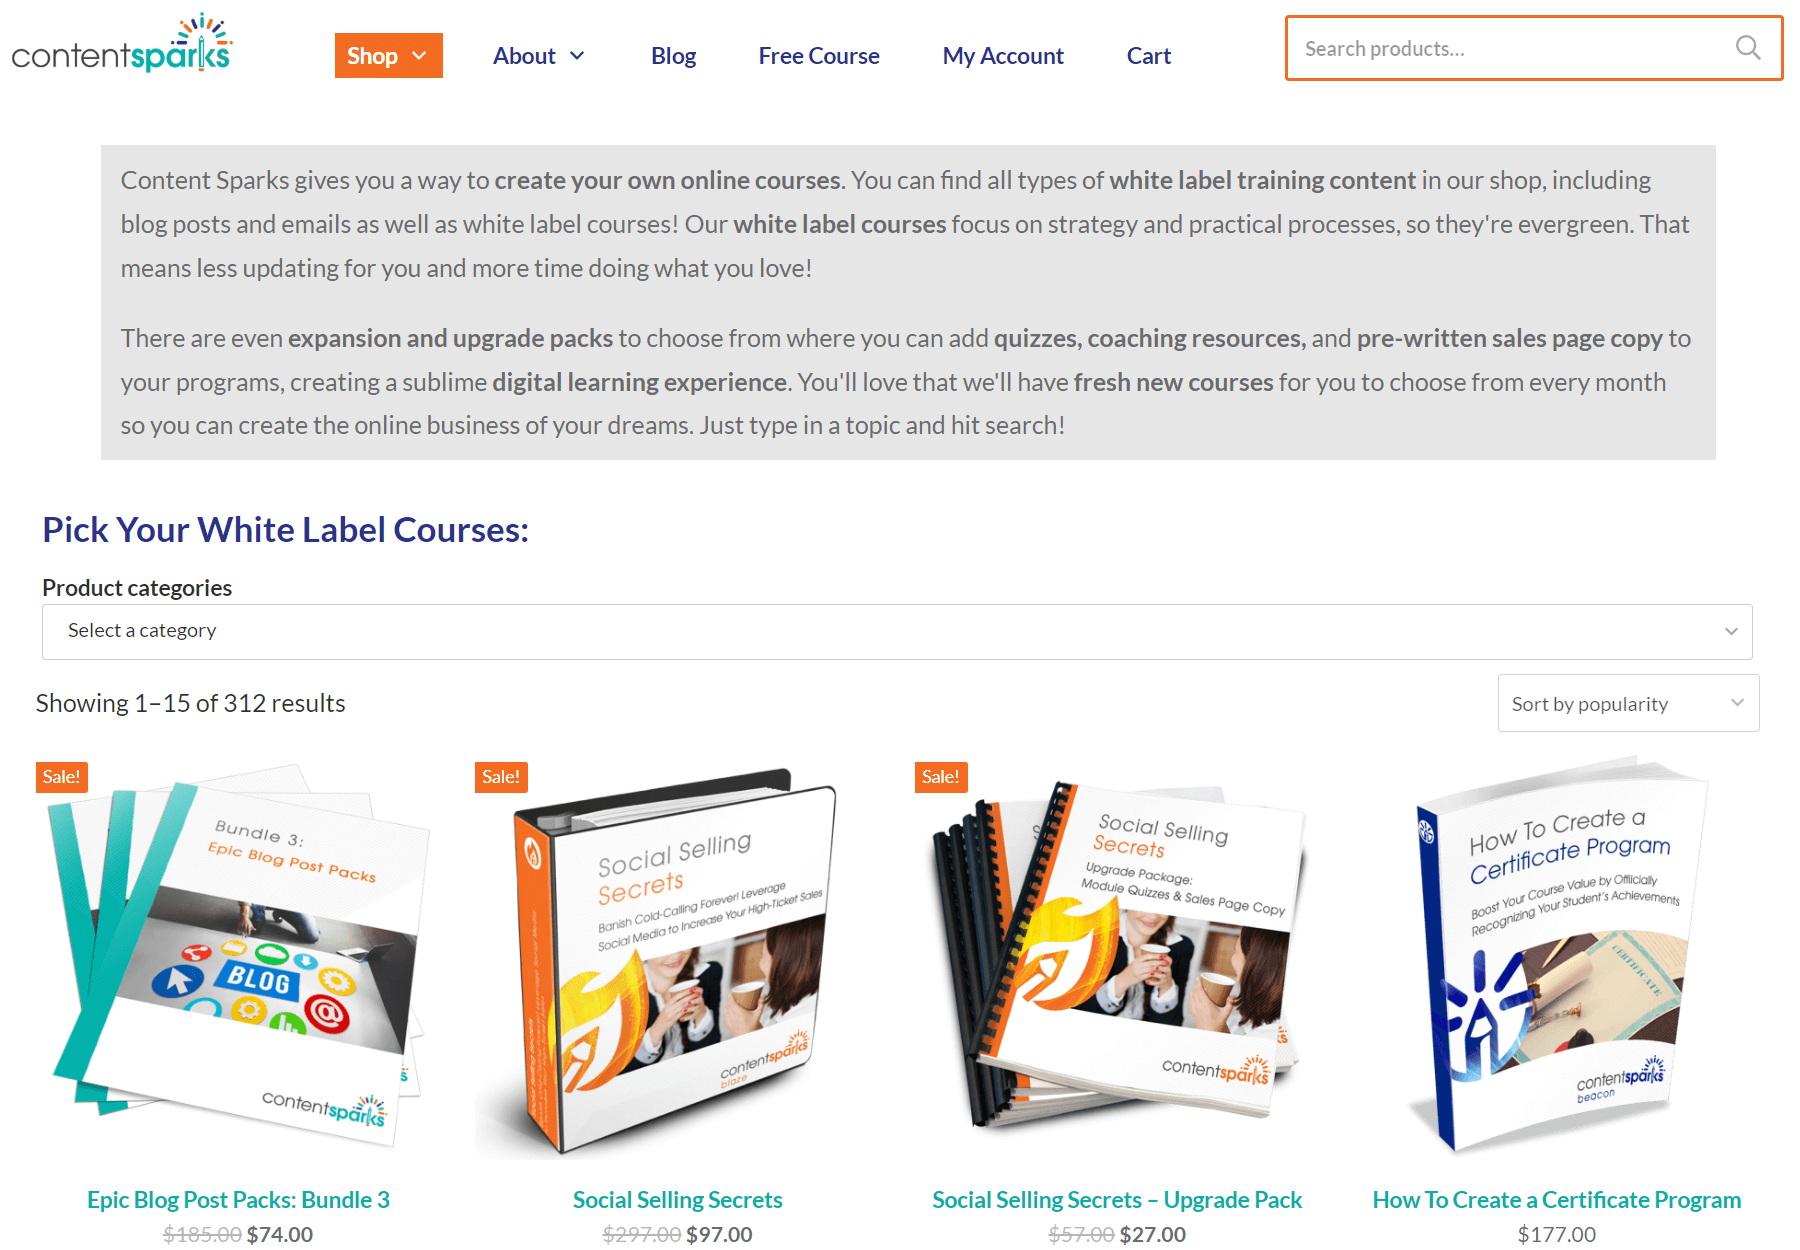
You can skip the weeks and months involved in creating a course from scratch just by getting a license to one of our white label course kits.
We’ve done the hard work of researching hot topics, designing actionable learning experiences, and developing the course content. We even include lead generation funnel materials in many of our course kits.
Our white label courses are created by our team of learning and development experts, so you can be confident that you’re getting a professional quality course you can teach as your own.
All the content is fully brandable and editable. So you can have a course set up and ready to launch in as little as a weekend.
Just imagine what your life will be like when you have a full repertoire of training programs online and earning for you! You can make that dream a reality with white label courses from Content Sparks!
Check Out Our Full Range of Courses in the Shop
Teach Yourself. Then teach your audience.
Enjoy!

Tags
Comments are closed.
As always, your article is very helpful. The complete checklist will be added to our course SOP's to optimize our build process. Thanks so much!
I’m so glad it was helpful, Bridgette. After using it, if you see something that could use editing, let me know and we’ll update it.