Are you overwhelmed with all the day-to-day work of running your business? Having troubling carving out enough time to consistently build your reputation and bring in more clients? If so, you're probably like all the other coaches, consultants, and service providers out there.
But there are some who have already solved the dilemma of time vs. money when it comes to growing your business and having a life. These savvy business owners take advantage of some of the simplest technology available for content marketing automation.
They use a ‘content first' strategy in which everything works on auto-pilot. It's a funnel that leads people all the way through your sales process – from being totally unaware of you to becoming loyal customers.
Use this ‘content first' strategy to demonstrate the value you offer and to build your credibility before making offers for any paid products on services.
Here are the steps for your Content Marketing Automation funnel:
Let's look at each step in a little more detail:
Step 1. Create epic blog post
When people first come across you, they don't know who you are and they don't really care. What they do care about is getting whatever information they're looking for. And that's usually a solution to a problem.
If you can create an ‘epic' piece of content that addresses one part of one of your target customer's biggest problems, then they're going to start to sit up and notice you. They'll see that you can help them, start exploring your other content, and maybe even provide their contact details to receive even more.
Focus on finding out the biggest challenges your ideal client faces through surveys, forums, Facebook Groups, keyword research, bestsellers on amazon – anywhere your market is currently talking and buying.
Pick one challenge that's related to the product or service you want to sell and create a value-packed piece of content that addresses it. If it's a big challenge, pick one small aspect of it that you can solve in a blog post or other content.
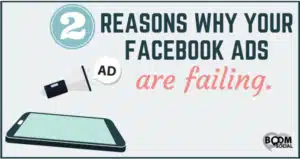
Here's a great example of a targeted blog post from Kim Garst at Boom Social. She's using it to lead up to selling a course about Facebook Ads:
Two Reasons Why Your Facebook Ads Are Failing
Of course, you'll then need to drive traffic to that blog post through every method within your budget. Use free traffic like social media, guest posting, articles, affiliate referrals, etc. And try paid traffic too, such as Facebook and Twitter ads.
Finally, if you intend to do future advertising and retargeting, add a tracking pixel to page. For example, you'll need a pixel from Facebook to create a custom audience who you can drive more ads to in the future. If you add that pixel to your blog post, you'll be creating a targeted audience of people who you know are already interested in your topic. And you can reach them without having built an email list at all!
Step 2. Add Call to Action (CTA) for gift in post
Next, you'll need to create a lead magnet or ‘content upgrade' that's relevant to your blog post and which adds even more value for your reader. This is how you'll start capturing email addresses from your interested readers.
Your lead magnet gift should expand on some point in your post and still be closely related to whatever you are selling.
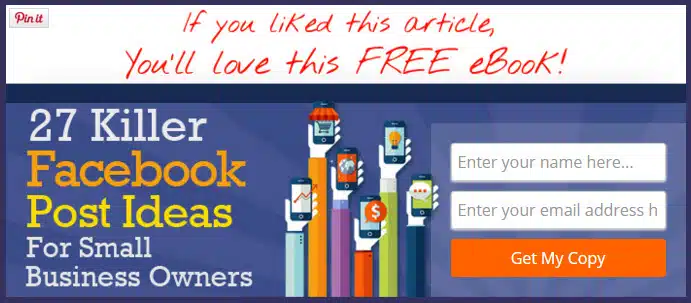
You can even add an extra layer by putting an offer for a very low cost product on your Thank You page after people have opted in. That's what Kim Garst did with the opt-in gift on the above post. Just scroll down to the bottom to see her opt-in box:
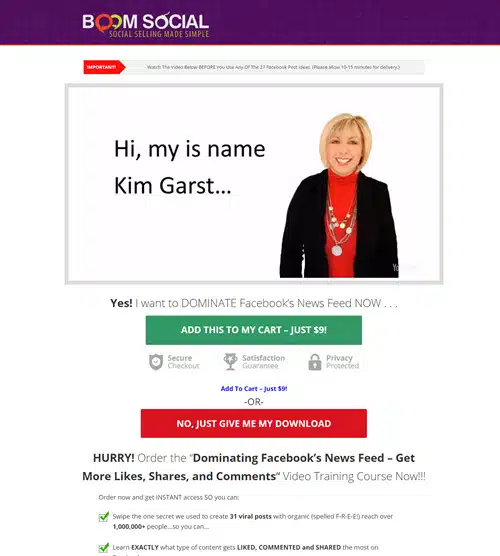
People fill in their details and are immediately directed to a thank-you page in which she introduces herself on a video and then offers a $9 Facebook video training series. Here's a snapshot of it:
Be sure to add your Call to Action for getting your gift in more than one place in your post, depending on the length of the content. However, wait until your readers have had a chance to recognize your value before putting any request or offer in front of them. That means putting your CTA at the end of your post and possibly in the middle, if it's divided up in big sections.
Lead boxes work well here (ones that pop-up when you click on an image or text), as do traditional opt-in forms.
Finally, be sure to add links to your paid products inside your lead magnet itself. People may be ready to buy from you at this point and you want to make it easy.
Advanced, but extremely effective:
If you added that tracking pixel on your blog post, you can start retargeting people who visited your blog post but didn't sign up for your gift. That means you also need to add a tracking pixel to the thank-you page for your gift. Your ad should be targeted to the custom audience who visited to your post, but exclude people who visited the lead magnet thank you page.
TIP: Your lead magnet doesn't have to be an enormous ebook. In fact, people prefer more targeted solutions that solve one problem and which can be applied immediately.
Depending on the product or service you're going to promote, try using some of the done-for-you content at Content Sparks.You could use one of the opt-in reports in the Blaze packages. But think beyond that to checklists, templates, and resource lists. All you need to do is expand them where necessary to make them stand-alone. Then add some design and branding.
Step 3. Send automated, valuable follow up emails
Once you have people's email addresses, you can start sending an automated series of emails that shows even more of what you can do to help your new subscribers.
Stick to mostly high-value, problem-solving content in the beginning. Send evergreen tips for using the gift you gave them, how-to's, inspiration, and other content related to the original blog post and the lead magnet.
You can start sharing links to your own paid products as early as the first email, if you put it in your P.S. However, after a few emails you can also send emails that are focused on an offer. How soon you send promo content will depend on how much you feel your market needs some education or demonstration of value first.
A tactic that most successful marketers also use is scarcity. People will put off a decision if there is no deadline or urgency involved. Your scarcity could be a time when a sale expires, a bonus that's only available for a short time, a cap on the number of products or services you sell at a certain price, a coupon that expires at a certain date, etc. Since you're automating your follow-ups and must keep them evergreen, your options here will depend on the technology available to you.
The most important thing to remember about scarcity is that it MUST BE REAL. Don't say a sale is ending, then reopen it a day later. Don't say that you'll only sell 100 copies, but then open it up to another 50. You'll just damage your own credibility and lose people's trust.
Advanced, but highly effective:
If you've been tracking visitors and subscribers with your tracking pixel, you can also track who has purchased your products or services. This involves having a pixel on the thank you page for your product too. Then you can target ads to a combination of people who visited your blog post, downloaded your gift, but did not purchase your product. You'll reach these people even if they never opened a single email.
Step 4. Move buyers and non-buyers to different lists with tags
The next part of your content marketing automation funnel happens behind the scenes in your email marketing system. You need to segment your subscribers between buyers and non-buyers (leads).
How much and how detailed your segmentation is depends on the functionality of your email platform. At the minimum you should have two lists – one for leads who subscribed to your lead magnet and one for people who bought your product or service.
As soon as people buy something, you need to set up your system to move them to a customer list for that product. Add tags, if possible, for what they purchased.
People who haven't purchased just stay on your leads list until they finish whatever email follow-up series you've set up.
TIP: Have content ready to send to both lists and remember that non-buyers may want to purchase something in the future. They just might not be ready today.
Step 5. Send relevant emails with content and offers
You last step in your content marketing funnel is to send relevant emails to each of your lists that continue to build your relationships and get more sales.
For your customers, start with an automated series of ‘onboarding' emails that help them use the product or service they purchased. Tell them how to get started, walk them through tutorials, give them extra tips and support, check in on progress, collect success stories, and ask for feedback and referrals.
After your customers have had time to use what they've purchased and see results, you can start sending related offers for other products and services. Actually, if there are items that would help them right away, don't wait to tell your customers. They'll only know about your other offerings if you share.
For people who didn't buy right away, don't just abandon them. It's possible they weren't ready yet or that particular offer wasn't quite the right fit.
Sends those leads additional, relevant content that they might be interested in, as well as related offers.
TIP: We also provide course follow-up emails in our Blaze packages. But, like the opt-in follow-ups, you should look beyond those for email content. Consider getting a related, smaller report or course from our Flash or Beacon series. Then break that up into a follow-up series of emails for customers who bought the more general course.
The key is to help customers implement what they learned AND start leading them towards your next offer.
And, as always, look to Content Sparks for additional products and courses you can offer to your customers and leads – so you don't have to start from scratch!
Finally…
Rinse and Repeat!
As you implement your content marketing automation, monitor how well each piece of content performs and make tweaks where needed. For example, if one email doesn't have a high open rate, try editing the subject line. If your lead magnet isn't getting a great conversion rate, try editing the copy in your opt-in box. You could even try a completely different lead magnet.
Once you're happy with the way your funnel is performing for one product, do the same thing for your next big offer, from blog post through to ongoing emails.
Actually, your initial content doesn't have to be a blog post at all. It could be any great content that gives you the ability to add links and calls to action, such as a video or slideshow.
And once again, remember that you DON'T have to create all this content from scratch!
Want to see this in action with Content Sparks' Content?
In this video, I go through each step of the Content Marketing Automation funnel and show where you can use sample content from Content Sparks. In this case, I used the content from our course on The Emotional Intelligence Advantage. However, you could use ANY of our content:
[s3vpp id=debc62b0d790b8fde4f649439859f529]
Check out all the content that's done-for-you and ready to personalize at Content Sparks.
In particular, look at our ‘Blaze‘ packages, which have a full funnel of content ready-to-go 🙂
CLICK HERE to see what content you can pick up today>>
Enjoy and let me know if you have any questions.
Tags
You may also like
Comments are closed.


Sharyn, excellent and helpful post. Thanks!
Howdy I am so excited I found your blog, I really found you by mistake, while I was looking on Askjeeve for something else, Regardless I am here now and would
just like to say thanks for a remarkable post and a all round interesting blog (I also love the theme/design), I don’t have time to look over it all at the moment but I have bookmarked it and also
added in your RSS feeds, so when I have time I will be back to
read much more, Please do keep up the superb b.