How to Create an Email Course with PLR [Step-By-Step Guide]
1 comments
1 comments
Interested in creating a course that grows your audience and boosts your revenue, but intimidated by the thought of launching an entire curriculum?
Meet your new best friend, the email course.
Email courses are a great way to dip your toes into the course-creation pool as they are usually much simpler to create and can be an excellent upsell to your existing services or free lead magnet on your website.
In this guide, I’ll show you how to take content from a brandable (PLR) report, course book, or ebook and use it as the foundation for an email course.
For all the types of courses you could create, why email?
I have four good reasons you should be using an email course to build your audience or bring in a little extra revenue:
Email courses are much quicker to create than a full course with lessons, modules, and assessments - but they still take time. The best way to speed things up is to purchase a PLR course or email series and customize it.
PLR (Private Label Rights) content is any type of content that gives you the right to edit, change, or modify it however you want. Some sites vary the limitations of these rights, but the intent is the same.
Once you purchase the private label rights to any online content, you can treat it as either a finished product or a rough draft of your own. It's yours to edit, transform, or publish in any way you want. If you are brand-new to the PLR world, check out my quickstart guide to using PLR to grow your business.
Now that you know what PLR is, next up I’ll show you the exact steps to turn a PLR product into an email course.

The beauty of using PLR to create your email course is the hard part of creating the actual content is already done for you. All you need to do is set up the emails in your email marketing tool of choice and you’re all set.
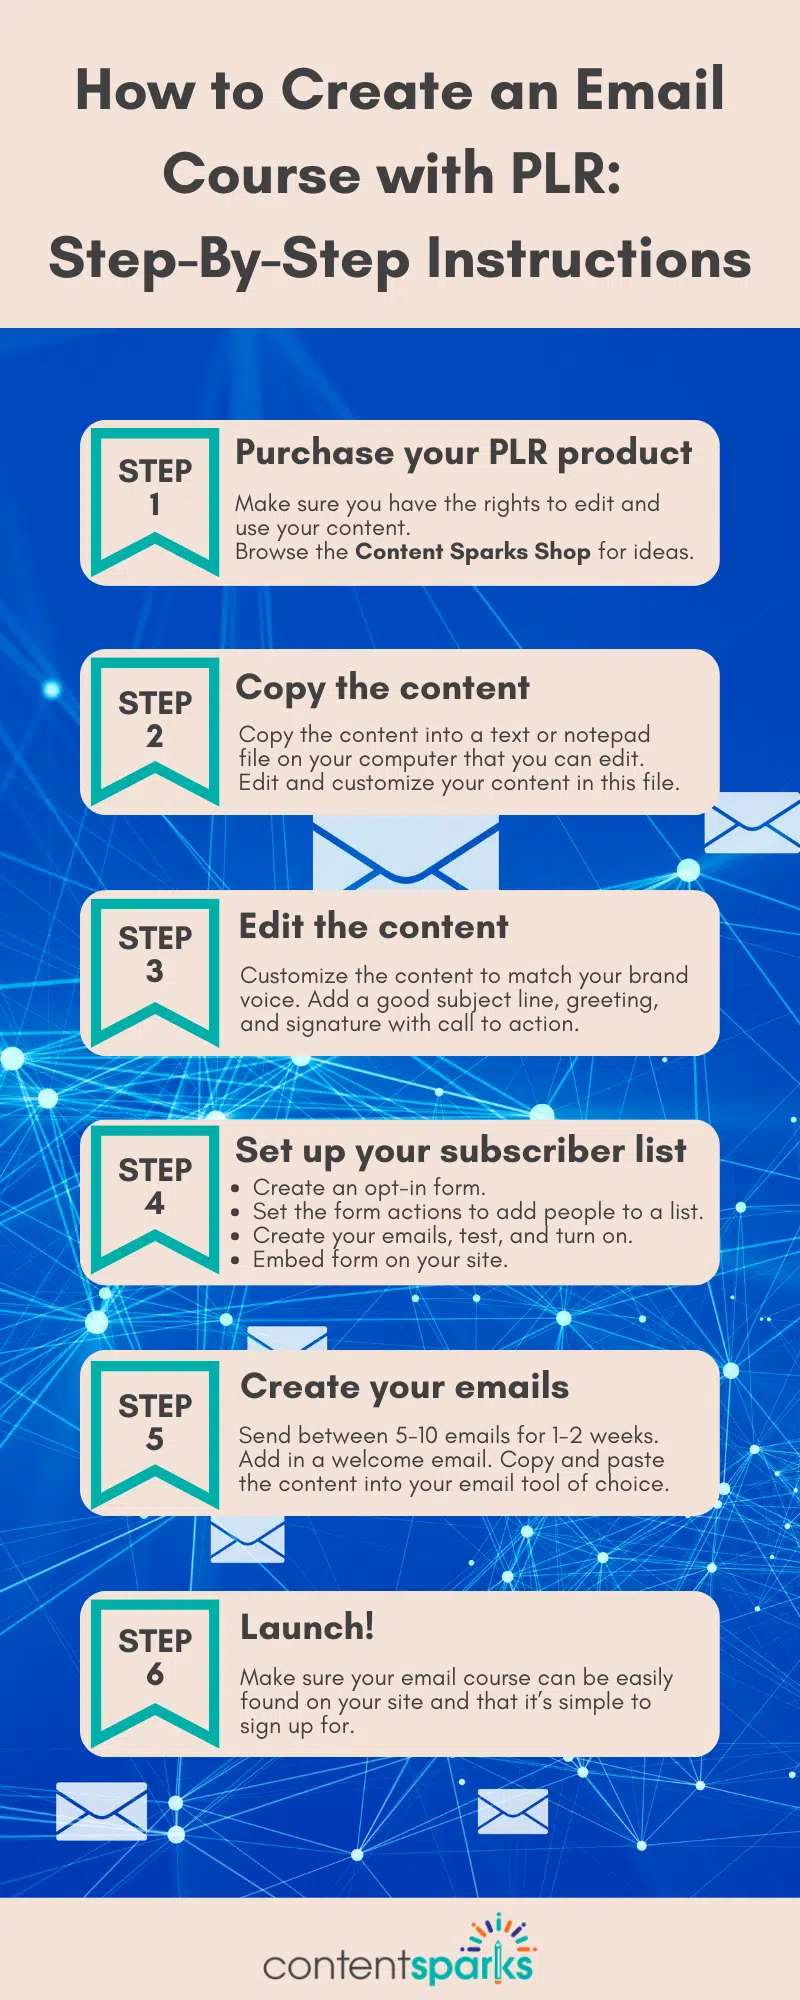
Here are the exact steps you need to take to create your email course with PLR:

Want 30% Off Your Next Online Course?
Never miss a deal or tip when you sign up for my regular email updates.
Purchase Your PLR Product
The first step is to (obviously) purchase your PLR report, eBook, or email series that you’ll use for your email course.
First, make sure you have the rights to edit and use this content.
When purchasing a PLR product, it’s always important to double-check what the rights allow you to do with it. I have plenty of PLR products in my shop that are all fair game to re-brand and use to grow your business.
Check out my PLR challenges, PLR reports, and PLR emails to see what would fit best for your audience.
Or browse through our PLR courses, content types, and topics for even more content to repurpose to an email course.
While my PLR products will look pretty good “out of the box,” you’re going to want to customize them a bit before sending them.
The first step is to copy the content into a text or notepad file on your computer that you can edit and then paste into your email marketing platform for final editing. I use the built-in Notepad on my Windows computer to create a ‘text' or .txt document. That will strip out all formatting, which could get messed up in an email layout. Many email platforms get confused by existing formatting if copied from Word.
Next up, you need to customize the content a bit to match your brand voice and tone. Customizing PLR is a key step to make sure that your course sounds like it’s coming from you instead of someone else.
For starters, I recommend breaking up the content into email-sized portions and tweaking the wording to match your writing style. You don’t have to go too crazy: a little refinement of your PLR course goes a long way.
Be sure to add a good subject line, your standard greeting, and a signature and call to action (asking people to do something).
If you don’t have one already, you’ll need a subscriber list in your email marketing platform to send to.
If you don’t already have an email list then don’t sweat it. Check out my complete guide (including tools and templates) to building an email list for your courses.
An alternative, to keep your number of subscriber lists under control, is to simply create a ‘tag’ that triggers your new email course series automation. Most platforms have this option.
Here’s how it works:
I use ActiveCampaign, which has a lot of features for automating different processes based on what your subscriber does.
Whichever tool you use, the key is to automate as much as possible.
We’re nearly there - now it’s time to set up your emails in the tool of your choice and prepare your email course for its launch.
You can send any number of emails for your email course, though I’d recommend sending them somewhere between 5-10 emails for one to two weeks.
Anything less and you will either have to send particularly long emails to cover the material or not deliver much value. Anything more, and your course runs the risk of burning students out or ending up in the junk folder.
I typically recommend sending an initial “thank you” or welcome email to new students to give them a preview of what to expect in the email course and how to get the most out of it.
Then, simply copy and paste your course material into your email tool of choice and make sure everything looks good.
Also, if you want to provide your subscribers with a PDF version of the email content, you can always attach it to the email itself. Alternatively, you can embed the pdf or a link to the pdf on a ‘gated' or hidden blog post that only people with a direct link or access can see. Then just insert the blog post link into the relevant email.
Now that everything is set up it’s time to launch your email course to the world.
You could use your email course as a free lead magnet on your website to attract website visitors to your list. You could set up your email course as a low-ticket offer to complement your other products/services and drive a bit more revenue for your business.
However you slice it, make sure that your email course can be easily found on your site and that it’s simple to sign up for. Your new students will take care of the rest.
In the video, I used the opt-in report from a course on creating the most important email sequences every business needs. The course itself is here:
==> Essential Email Sequences that Engage, Nurture, and Convert
You can customize and edit anything in that course so that it works for your market and needs. The opt-in report I used is in the Lead Generation Materials that are included in the full course.
However, you can take any PLR and follow the same process as I did. Just be sure to add your own action steps at the end of each email, if there aren’t ones already included. That’s what makes your new course results-focused - which gives you happy, loyal customers!
Give your business a major head start with 30% off your first order from my shop!
Subscribe and save 30% on your first order, and see how PLR can help your business grow.
I have dozens of PLR goodies, ranging from lead magnets and workshops to fully-fledged online courses in my shop. Browse around today and find the right product to use for your business.
Unlock 30% Off Your Next Course!
Never miss a deal or priceless business tip when you sign up for regular email updates
When you purchase a license to any of our ready-to-go course kits, you get the rights to edit it any way you want (or leave as-is) and add your own name and branding.
Then use your new course to:
Enjoy!

Tags
Comments are closed.
Thank you. That was very informative. I will be looking at some of my PLR in a different light now.